

Bags, bags, bags … We love bags! They keep us organized, they protect our belongings (especially gaming pieces and electronics), and they can make a stylish statement. The only problem we’ve found is that you really have to search to find the right size of bag, especially if you want a color other than plain black. Who’s got time for that when your gaming station is calling your name?
We get you, because you are us. Here are some no-sew options for making a bitchin’ bag for your gamer friends this holiday. And if you make a few for yourself, well, we won’t tell!
NOTE: We call these gamers’ bags because they are meant for small collectibles, gaming pieces, graphic novels, and electronics. These fabrics and style won’t hold up to heavy items like a purse or tote would. For your laptops and gaming stations, it’s better to go for the heavy duty canvas, leather, or polyester bags with reinforced corners and bottoms you can find in stores. HEY, we take our gaming seriously, and we know you do, too!
Style
There are a lot of different styles of bags, and we decided to go with the envelope style for a few reasons:
- It’s easy to make because you don’t have to worry about creating a flat bottom for support.
- It’s easier to fit multiple envelope bags in a larger bag (like file folders in a cabinet).
- There’s less wasted space and lower likelihood that you’ll be fishing for some lost object in the bottom.
The biggest con, though, is that not having a flat bottom means the bag won’t stand on its own. However, you can always alter your design if you want to add it in―we’re just not tackling that here. Another smaller con is that the envelope style just has a flap closure at the top, meaning small things will fall out if you’re not careful. You can combat this by using velcro all the way across the top or sewing in a zipper if you have some some sewing skills.
Fabrics
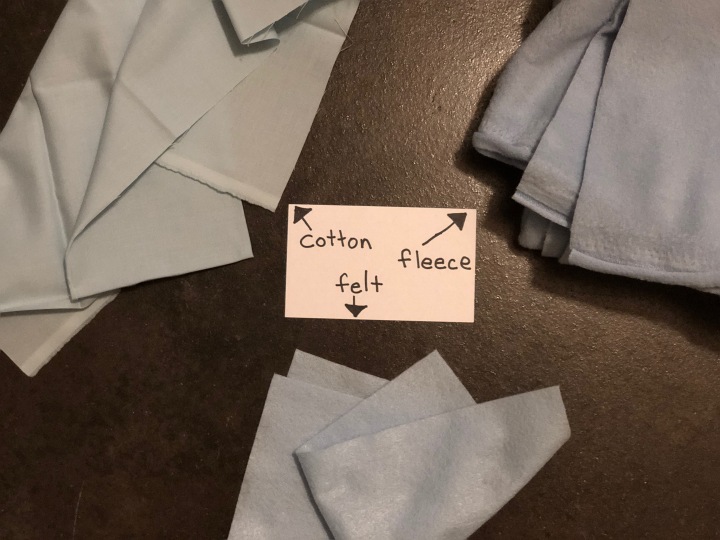
We like variety, which is good because every fabric has its own advantages and disadvantages. To help you decide which will be better for your project, we picked three-ish: cotton, felt, and fleece / flannel. We grouped fleece and flannel together due to their similar composition.
Cotton
While cotton has the most patterns – including scifi, superheroes, and wizards – it also is the most likely to fray at the edges. The way around this is to use some of the supplies below to hem the edges and seal in the seams. Don’t worry, we did promise this would be no-sew!
Felt
There is no fraying with felt like there is with cotton, but there also isn’t the variety of patterns. Most felt we’ve found only comes in solid colors. However, if your plan is to add lots of decorations, having felt in a solid color as a background would be an asset.
Fleece / Flannel
These guys are great because they have more patterns than felt but don’t fray like cotton. The biggest difference is that cotton and felt do have some stiffness, but fleece and flannel have none. That makes for a floppier bag, in case you were wondering. Also, stay away from minky fleece, which is the extra soft fleece like the kind they use for baby blankets. It will fray and fall apart all over the place, unlike standard fleece.
Supplies
In addition to the fabric, you’ll need a few other supplies as well, such as scissors, straight pins (to hold it in place), and chalk / a pencil to lightly mark where you want to cut. These supplies stay the same no matter what fabric you use. However, the fabric can determine which of the following supplies you will need.
Adhesives
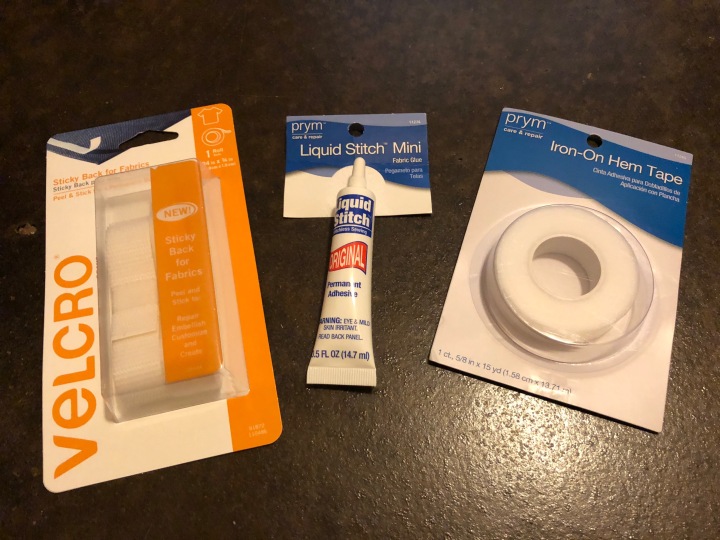
- Iron-on hem tape is a great adhesive for sealing those seams, but it is best used on the cotton because of the heat necessary from the iron to get it to stick. Felt can be ironed, but only lightly and with low heat, and fleece cannot be ironed at all. So, only cotton gets the tape!
- Sticky things work best with smooth surfaces, so the sticky-backed velcro should be kept to the cotton. We wouldn’t necessarily use this on the bag’s side seams, although it could be cool to open a bag completely flat like that would allow. Even so, you might want to keep velcro for a top closure only.
- Liquid stitch is like super-glue for fabric and works well on all of the fabrics. The only drawback here is that it can get pricey if you’re using it for an entire bag. To lower your costs you can limit the glue to just pockets and decorations.
- Some of our methods won’t even use adhesives! For instance, on felt we are going to hole-punch and weave the seams, which gives it a crafty look. On the fleece we will fringe and knot the sides for yet another easy, but cute style.
Decorations

You have some fun options for decorations that are no-sew, too! You’ll still need to take into account your fabric type. For instance, iron-on patches should be restricted to cotton. Pins (con pins or costume jewelry) can be used on anything, but beads are best for fringe on fleece. Ribbon is cute when woven through felt to girly it up.
Instructions
Now that you’ve settled on your fabric, let’s get down to the actual steps of our DIY how-tos. These first set of instructions apply to all of the bags, so make sure you follow them first!
- Measure your fabric for the size of bag you want, leaving an inch extra on the three open sides (If you want your bag to have a flap over the top, make sure you leave extra fabric for that, too). For the fleece, leave two to three inches around the sides, depending on how short or long you want your knotted fringe.
- You now have a rectangle, which you should fold down the middle. This folded part will be the bottom of your bag with the rest being the sides and top. For those of you planning a flap, fold where you want the bottom to be, leaving your extra fabric at the top of one side.
- Pin your sides where you want them to stay (I didn’t use pins in the examples for expediency).
Bag 1: Cotton with Hem Tape

Step 1: Turn your fabric inside out so the design (if any) is on the inside, and get your iron, ironing board, and iron-on hem tape ready!

Step 2: Measure your hem tape to a side and cut it so the piece will fit between the two pieces of fabric. Do the same for the other side.

Step 3: Place the hem tape between the two pieces of fabric. Trim if any is sticking out.

Step 4: Follow the directions for the hem tape, which will probably say something like placing a damp cloth between the iron and the fabric and using the iron on a steam setting for wool. Repeat for other side.

Step 5: Once you’ve done both sides (front and back) and have allowed it to cool, turn the bag inside out. Now, the printed side is on the outside like it should be and you have a nice, clean seam!
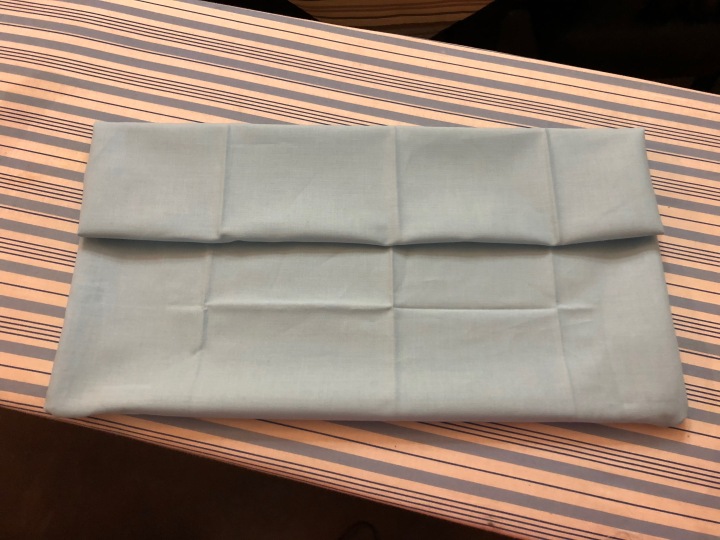
Step 6: If you had a flap, you can use the hem tape on the flap piece, too, so it doesn’t fray.
Bag 2: Felt with Ribbon

Step 1: Get your scissors and some thin ribbon.

Step 2: Cut a slit in the side through both pieces, making sure it’s slightly larger than the width of your ribbon.

Step 3: Repeat cutting the slits up both sides, stopping before you get all the way to the top.
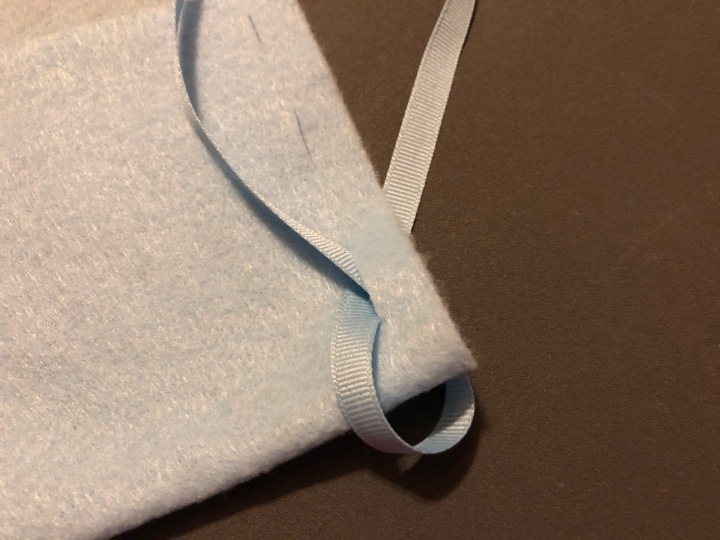
Step 4: Loop the ribbon through the slit, one end through the front and one through the back so they cross in the slit.

Step 5: Continue weaving the ribbon through the slits all the way to the top.

Step 6: Tie the ends in a bow or knot it and let the ends hang down for decorating.

Step 7: Repeat on the other side!
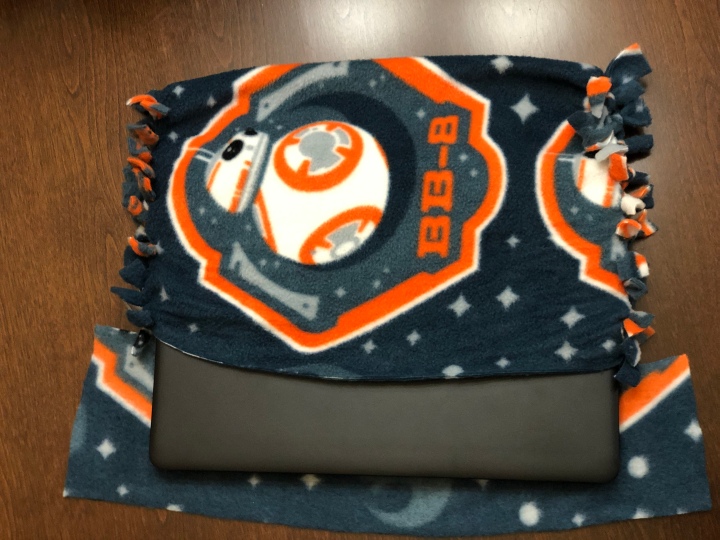
Bag 3: Fleece
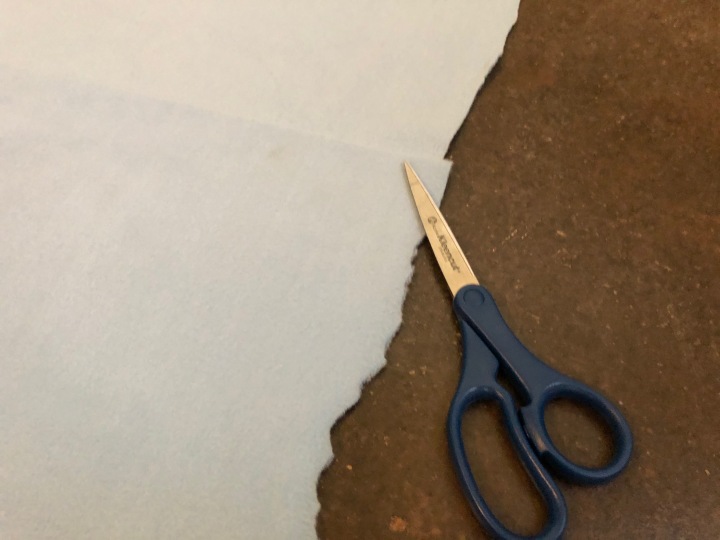
Step 1: Get your scissors. You don’t need anything else here! Note: I left the ragged edge showing so you could see that it doesn’t matter once it’s done.

Step 2: Draw a line about two inches in (or suited to your taste) as a guide for where to end your fringe. Start cutting your fringe at about half an inch a strip.

Step 3: Keep cutting the entire way up the side.
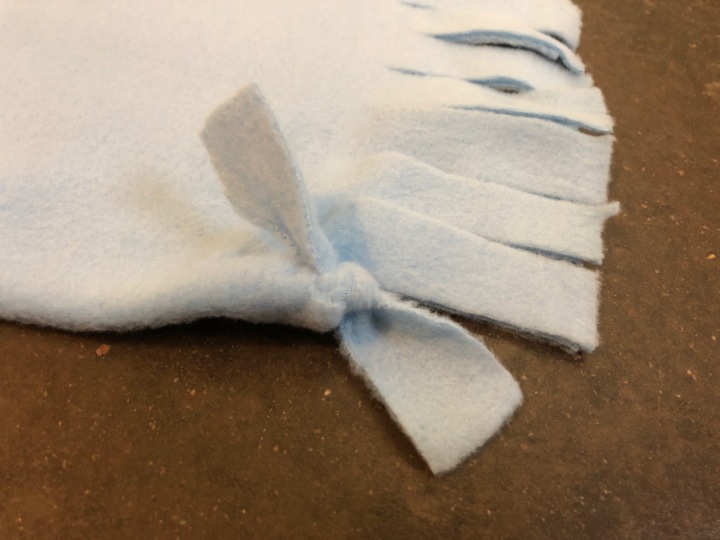
Step 4: Starting at the fold, take the first two strips and tie a square knot.

Step 5: Keep tying each two strips, working your way up the side. Tip: Plan on tying your knots the same way each time so you have consistent knots the whole way up.
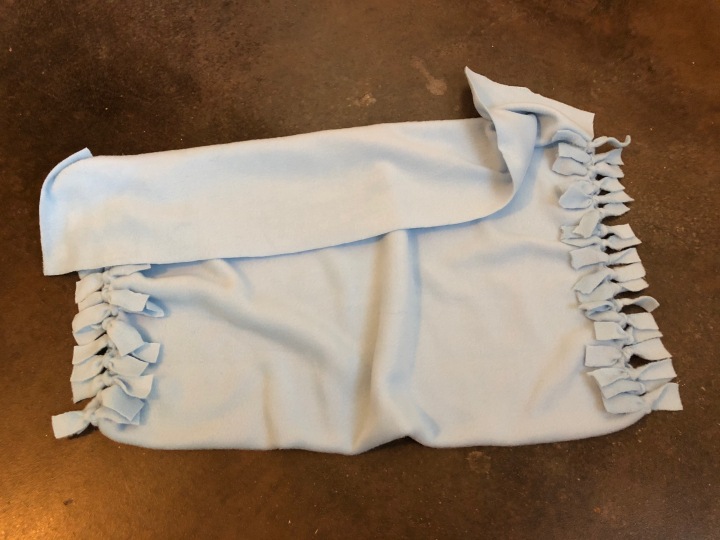
Step 6: Repeat on the other side and you’re done!
Now that you’ve done the creating, you can get to decorating and gifting. Have fun and share pix when you’re done!
Featured image credit: Courtney Langdon/Geek Gals

These are so stinkin cute!! I love the BB8 holder!
LikeLike